This
week I am decided to show you how to work with the newest release
from Paper Minis. If you have read my blogs for very long or watched
my videos you already know I love the kits that Ann produces. As soon
as I noticed this new kit I knew I had to order it. (I think I had it
ordered within 3 minutes of starting to read that week's newsletter.
LOL)
Since
this kit is a vintage item I had to figure out how to make it work
with my dolls who live in today's world. It didn't take me long to
come up with an idea.
You
see I have spent a lot of hours the last year or two going through
stacks of boxes of stuff that we packed up from my mom's house when
she passed away. Not only are there boxes of stuff from my childhood
but there are also an equal number of boxes from my mom's childhood
and even a few from my grandmother's childhood. These cards look like
they could have been in one of those many boxes.
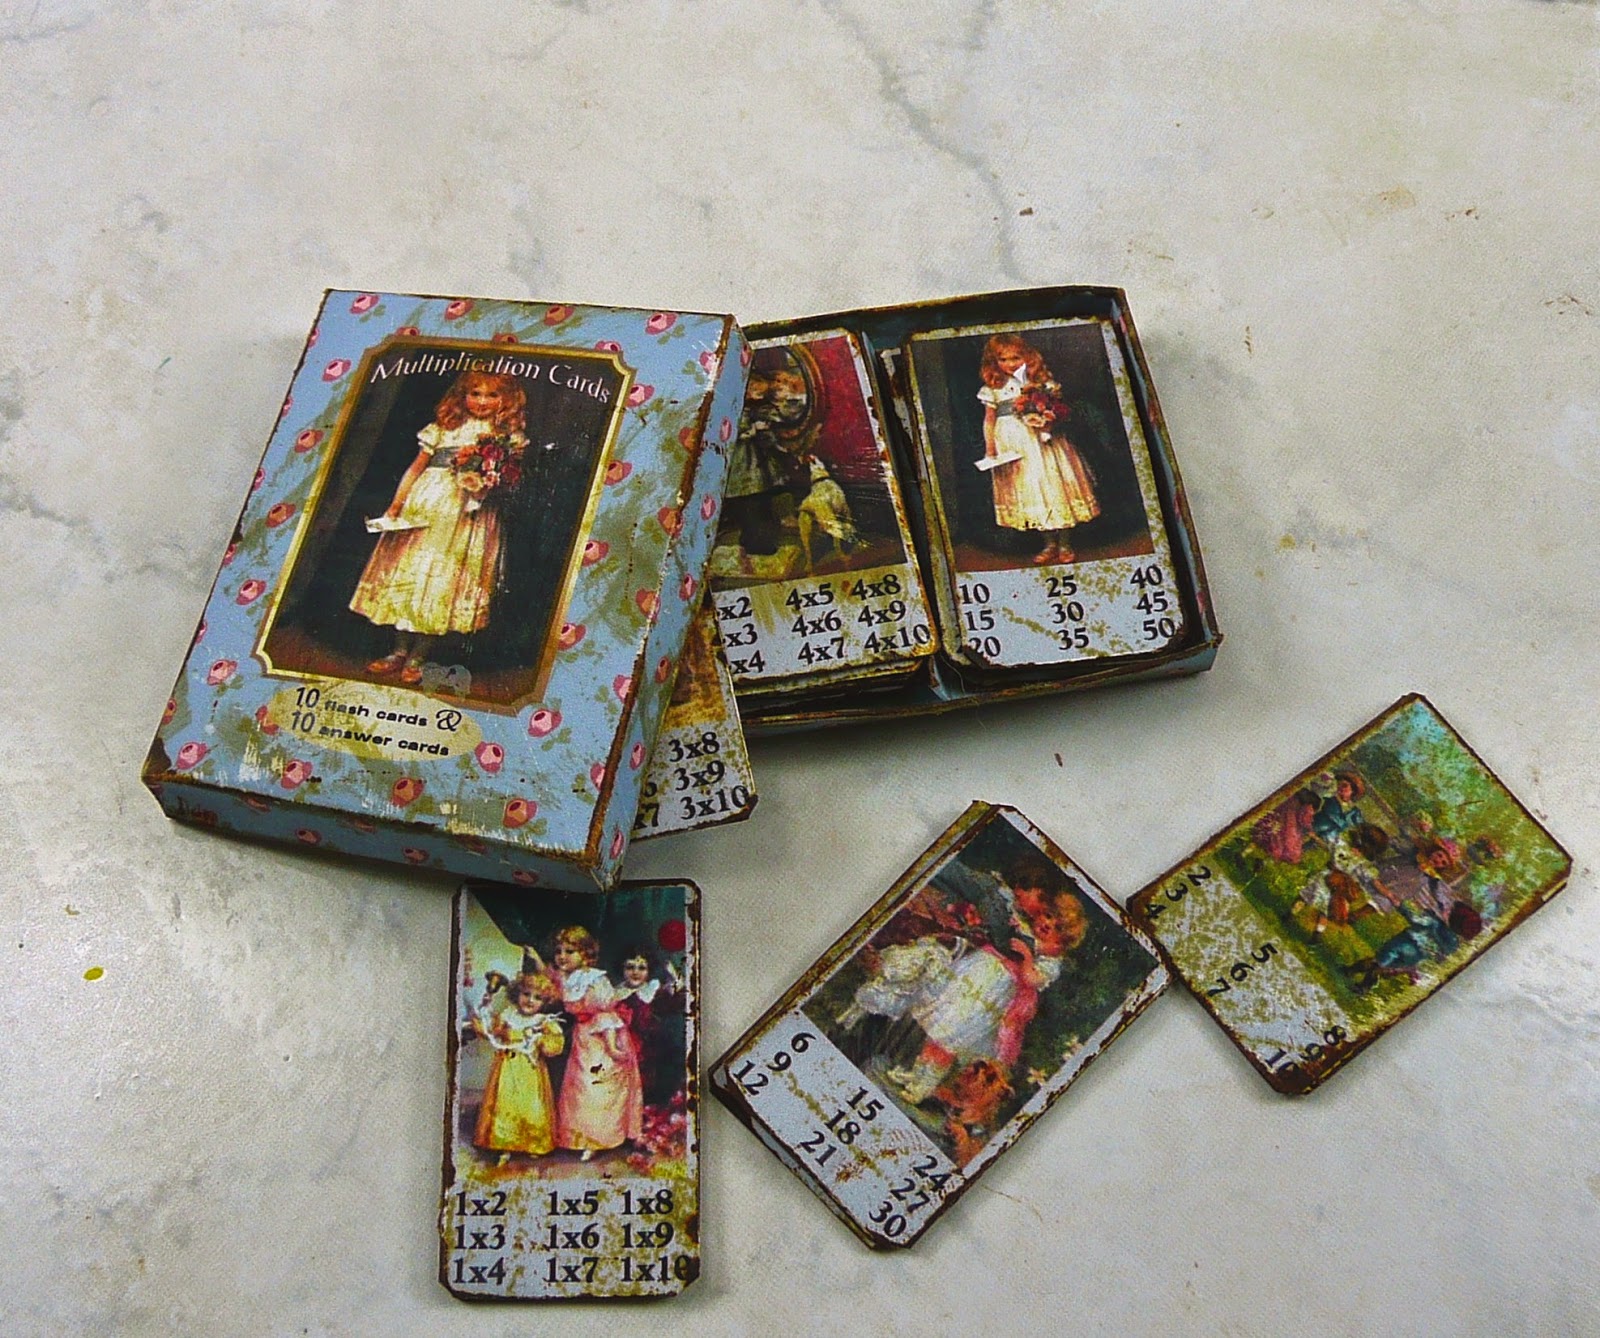
One
of the things I love to do with my dollhouse miniatures is to make
them look old and worn. I decided to take some of those techniques
and use them on this set of cards. I love the end result and they
look like they have been around for a hundred years, sitting a box in
someone's attic.
The
first step in making up this kit is to make your choice of paper. You
want a paper that it going to take the ink well and hold up to
scoring, folding and gluing. I decided to use a good quality Matte
finish photo paper. Photo papers will allow your printer to do the
best job it can do. The matte finish was important for a couple of
reasons. One being that I wanted to make these look old so I didn't
want any shine to them. Also because of the number of folds the matte
paper will hold up much better, glossy paper has more of a tendency
to crack on the fold lines.
When
you are printing your printies be sure to set your printer to 100%
size and to no borders, this is really important in getting your
printies to come out the correct size.
I
like to allow my ink to set at least a couple of hours if not
overnight before I handle them. It probably isn't important but it
seems to me that I get less smearing that way. I didn't seal my paper
but you can and should if your ink is not water resistant. I usually
don't for normal printies just for ones that I am going to be using
with a lot more glue or that I might need to clean in the future. (like wallpaper for a dollhouse)
I
like to score all my fold lines before I cut out the pieces. For me
it is just easier to do this while the pieces are all still together.
For printies like these I usually use my dental pick as my scoring
tool. As much as I would like to use my scoring board the lines it
makes are just too wide to use for these little pieces. After all the
fold lines are scored it is time to cut each piece out. Be very
careful and take your time- actually this is important for all the
steps in this project. The more care you take with each step the
better your final project will look. I use a combination of a
straight edge with a craft knife and a small pair of scissors to cut
out my pieces. Use whatever tools are the most comfortable for you.
After
all the pieces are cut out it is time to fold and crease on all those
fold lines we scored a little while ago. Also make sure all your cuts
are correct and that you know where to glue.
For
glue I used some regular Tacky Glue for the box and a glue stick for
the cards. Just don't apply too much glue. Clamp any places that need
to be clamped to stay the way you want them. Go back over each piece
several times while the glue it drying and make sure everything is
the way you want it be.
After
the glue was dry I checked each card and trimmed it as needed and
used a pair of curved manicure scissors to trim those rounded
corners.
If
your are making your cards to look new you are now done! They are
ready for your dolls to learn their multiplication facts. Since these
are in the style of the early 1900's I would bet either Samantha or
Rebecca would enjoy a set of them.
But
if you are going age your card set like I did it is now time for the
fun part!
To
age the cards I used some Distress Ink from the Tim Holtz line made
by Ranger in the colors: Vintage Photo and Old Paper. I also used an
emery board to rough up the edges/corners of each piece. I love the
finished look of my card set.
This
set is going to join some other items I have been planning and
working on for an Allison's Journal blog post in the future. You will
just have to wait to see what that story is.
I
would love to see your projects you make so be sure to send me
pictures of them. I also ask that if you do buy this set (or any of the others I have shown you) from Ann
that you let her know you heard about if from me. It is a lot of fun
for both of us to learn those things.

No comments:
Post a Comment