I
told you last time we made food that we would make something a bit
more healthy to offset all that candy we have been making for the
dolls. So this week we are going to take an in-depth look at how to
make carrots. I am starting out with some whole carrots from the
grocery store. My store doesn't carry the ones with the tops attached
so those will have to be a future video.
In
fact this time I am trying to keep this simple since I know a lot of
you are just starting out with polymer clay foods. I will show you
some more advanced versions of carrots in the future.
The
first thing I had to do before I could start filming was to get my
clay into condition. I had taken a quick look in my box of orange
clay a few days ago and saw that I had an almost complete block of
Sculpey III Orange. I didn't check it any further which I should
have. I took out the block of clay today to start filming and found
that this block of clay was really hard and crumbly. This is unusual
for Sculpey since it is usually way too soft but it does happen. It
was probably a block of clay that has been in my stash for a long
time or else was maybe not shipped originally under the best of
conditions.
I
knew that I really didn't want to go to town today and that I really
wanted to get this video filmed so I set to work getting this clay
useable. I didn't film the process but I will tell you what I did so
you can do the same if you ever need to. My first step in
conditioning clay that is hard is to cut it into slabs that will just
fit into my clay roller (pasta machine) I then run them through many
times. If the clay is really hard and dry it usually crumbles and
breaks up, I just gather it back together and keep repeating until
the clay starts to hold together. I then continue to roll it over and
over until it softens up. This clay finally held together but even
after a lot of rolling it wasn't softening up. And even worse when I
set aside some of the clay that I had been working with to work with
some more by the time I got the second batch starting to come
together the first batch was hardening up again.
So
on to step two: I gathered up all the clay put it into a plastic
sandwich, squeezed the air out and sealed the bag and then put the
bag inside my clothing against my body. The heat of the body is just
right to warm up the clay and many times this will allow me to work
the clay back to normal texture.
After
I felt the clay was warmed up I again ran it through the clay roller.
It was better but not soft enough and it was still hardening up when
allowed to sit.
On
to step three. I rolled out the clay in small batches and added just
a bit of Translucent Liquid Sculpey (TLS), just a bit you
don't want to make frosting you just want to soften the clay a bit. I
worked this through the clay until it was really well combined.
Now
the clay was almost back to normal but still a bit hard for what I
wanted to do with it. It was close to the texture of Fimo Classic, if
you are familiar with that clay you know how hard I am talking.
I
didn't want to add any more TLS because I didn't want to make the
clay sticky. So I grabbed a block of Translucent Sculpey III that was
sitting on my table and worked that in really well. I used probably 1
part Translucent to 4 parts Orange clay. I knew this would make the
clay more translucent but it won't affect the color of the finished
clay.
So
that is how I was able to save the clay and get the carrots done with
it. In case you are wondering the above process took me about 45
minutes.
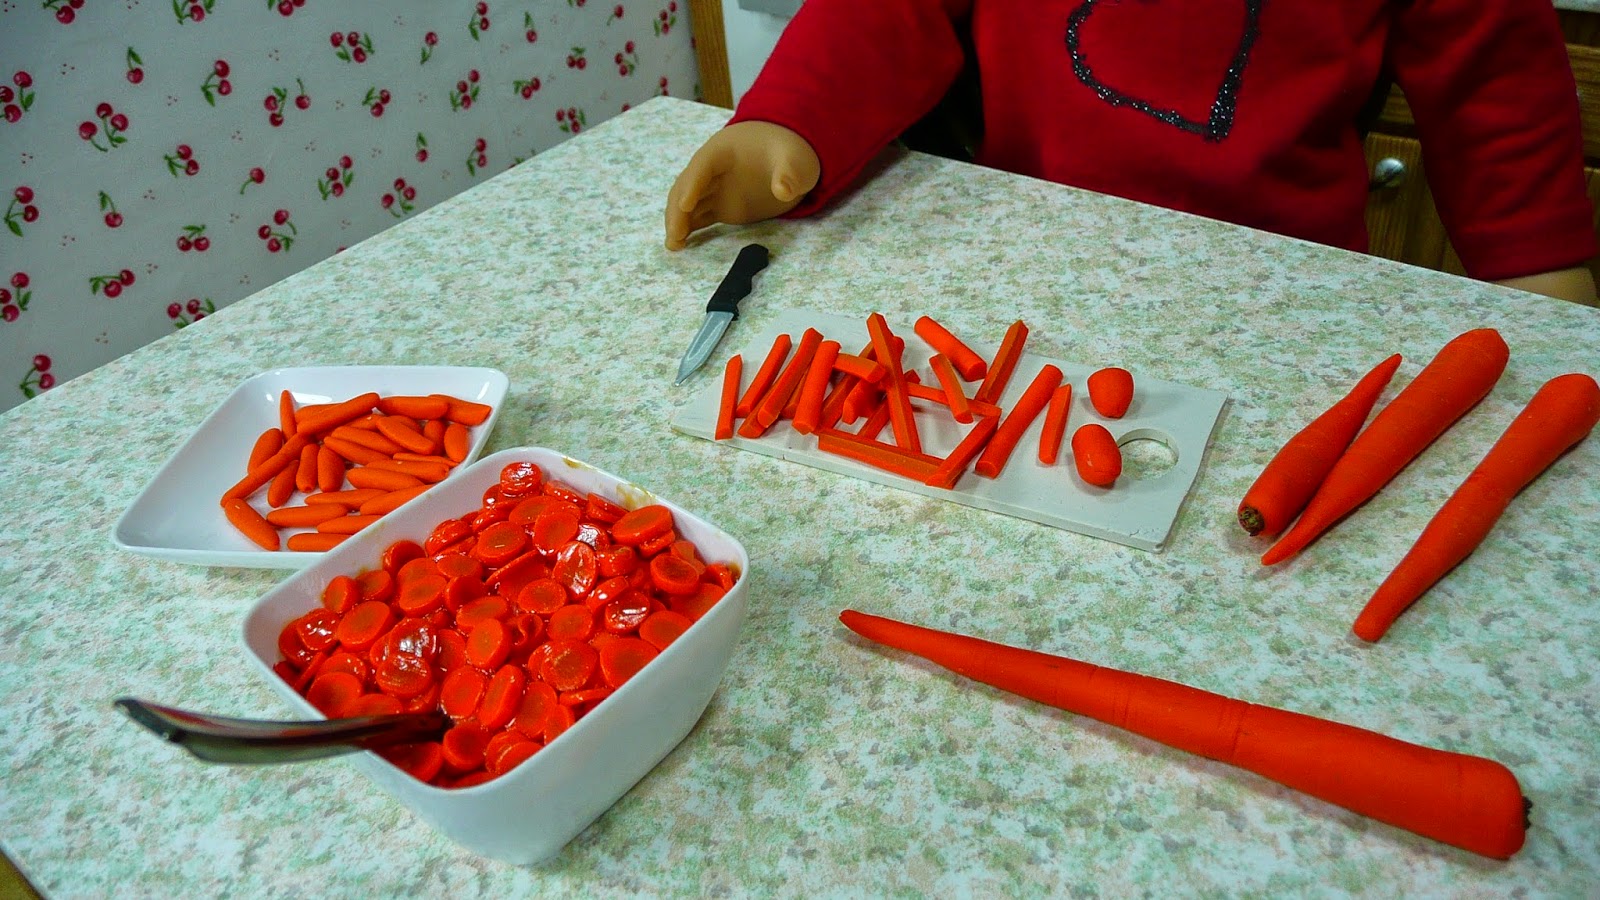
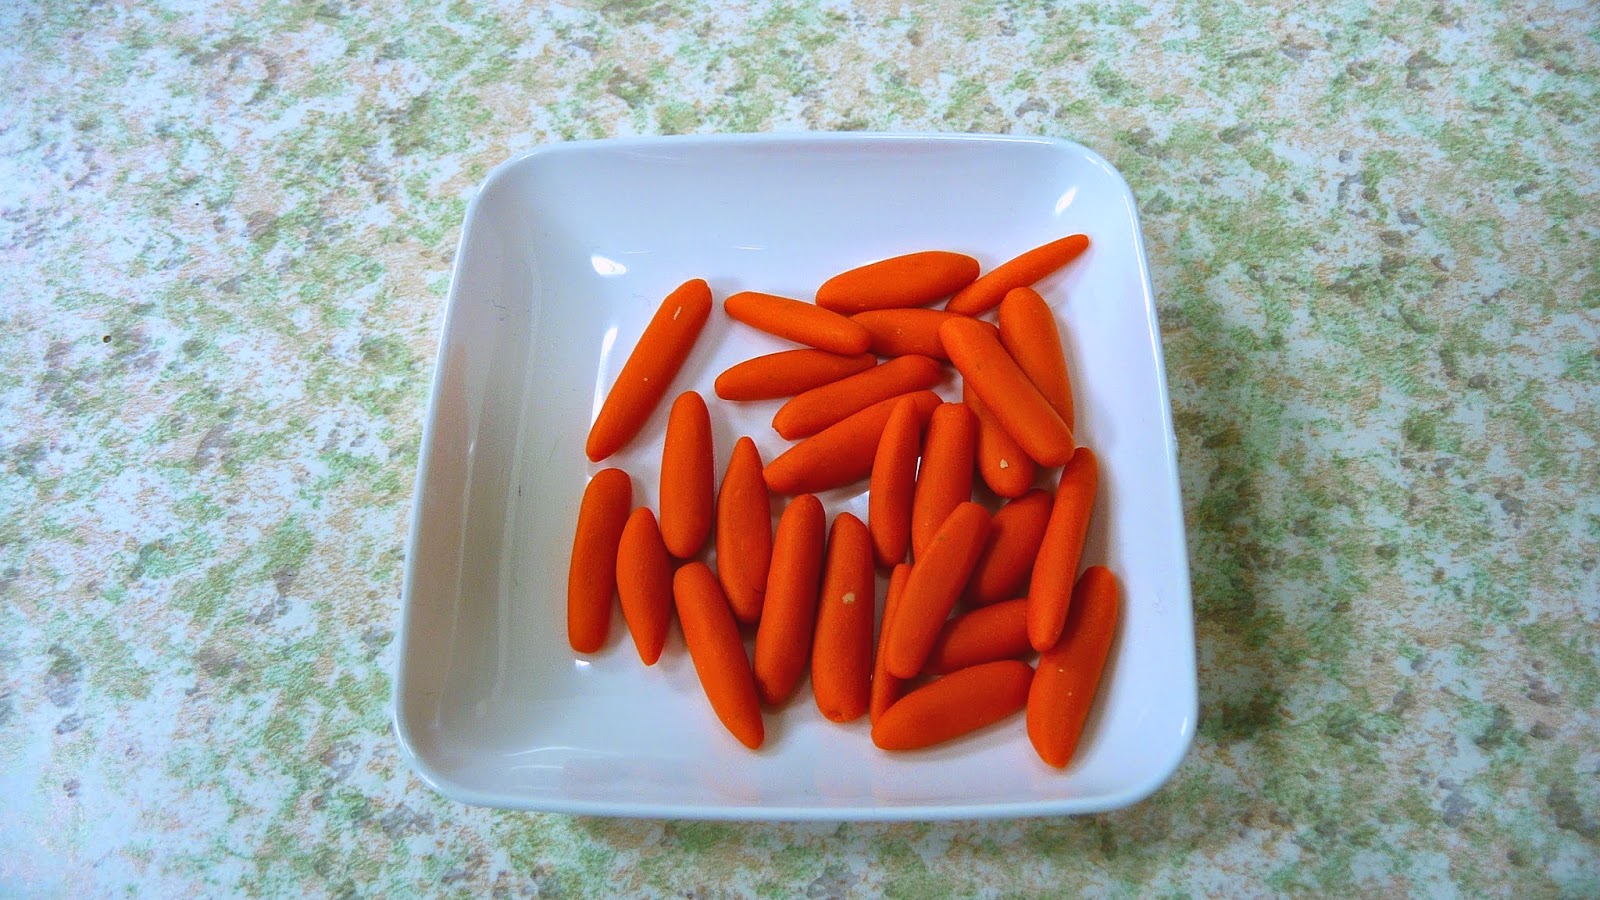
 Now
it was time to make some carrots. I decided to start with the whole
carrot just as it came from the store. I used the orange clay and
rolled it into a snake a bit larger than I wanted the finished carrot
to be. I then cut that into a piece a bit shorter than I wanted the
finished carrot to be. I did most of the rolling to shape the carrot
from one end and made it into a “carrot” shape. I used a round
clay cutter to mark the stem area and then roughed up the clay within
this area a bit. This is supposed to represent the stems that have
been cut off.
Now
it was time to make some carrots. I decided to start with the whole
carrot just as it came from the store. I used the orange clay and
rolled it into a snake a bit larger than I wanted the finished carrot
to be. I then cut that into a piece a bit shorter than I wanted the
finished carrot to be. I did most of the rolling to shape the carrot
from one end and made it into a “carrot” shape. I used a round
clay cutter to mark the stem area and then roughed up the clay within
this area a bit. This is supposed to represent the stems that have
been cut off.
I
used the back of my clay blade to make some very light, very thin
lines on the carrots. I used a couple of colors of chalk to add some
color to the outside and bake the carrots at 350 degrees for about 10
minutes.
I
used some dark brown and some green paints to give the top portion
some color.
Now
we get to make some carrot “coins” and some carrot sticks. This
is really easy and starts with a simple “bulls eye” cane. I made
the center of my cane with some Sculpey III in Sweet Potato because I
wanted to keep this simple and I wanted the center to show up in the
finished carrots. In the future I will show you how to make a more
detailed center cane inside the carrot cane. Over this center I added
two layers of the same orange clay that I rolled out on the thickest
setting on my clay roller. The important thing to remember is to not
let the ends of each layer overlap, you want them to just meet where
where they join. Then carefully reduce the diameter of the cane until
it is the correct size.
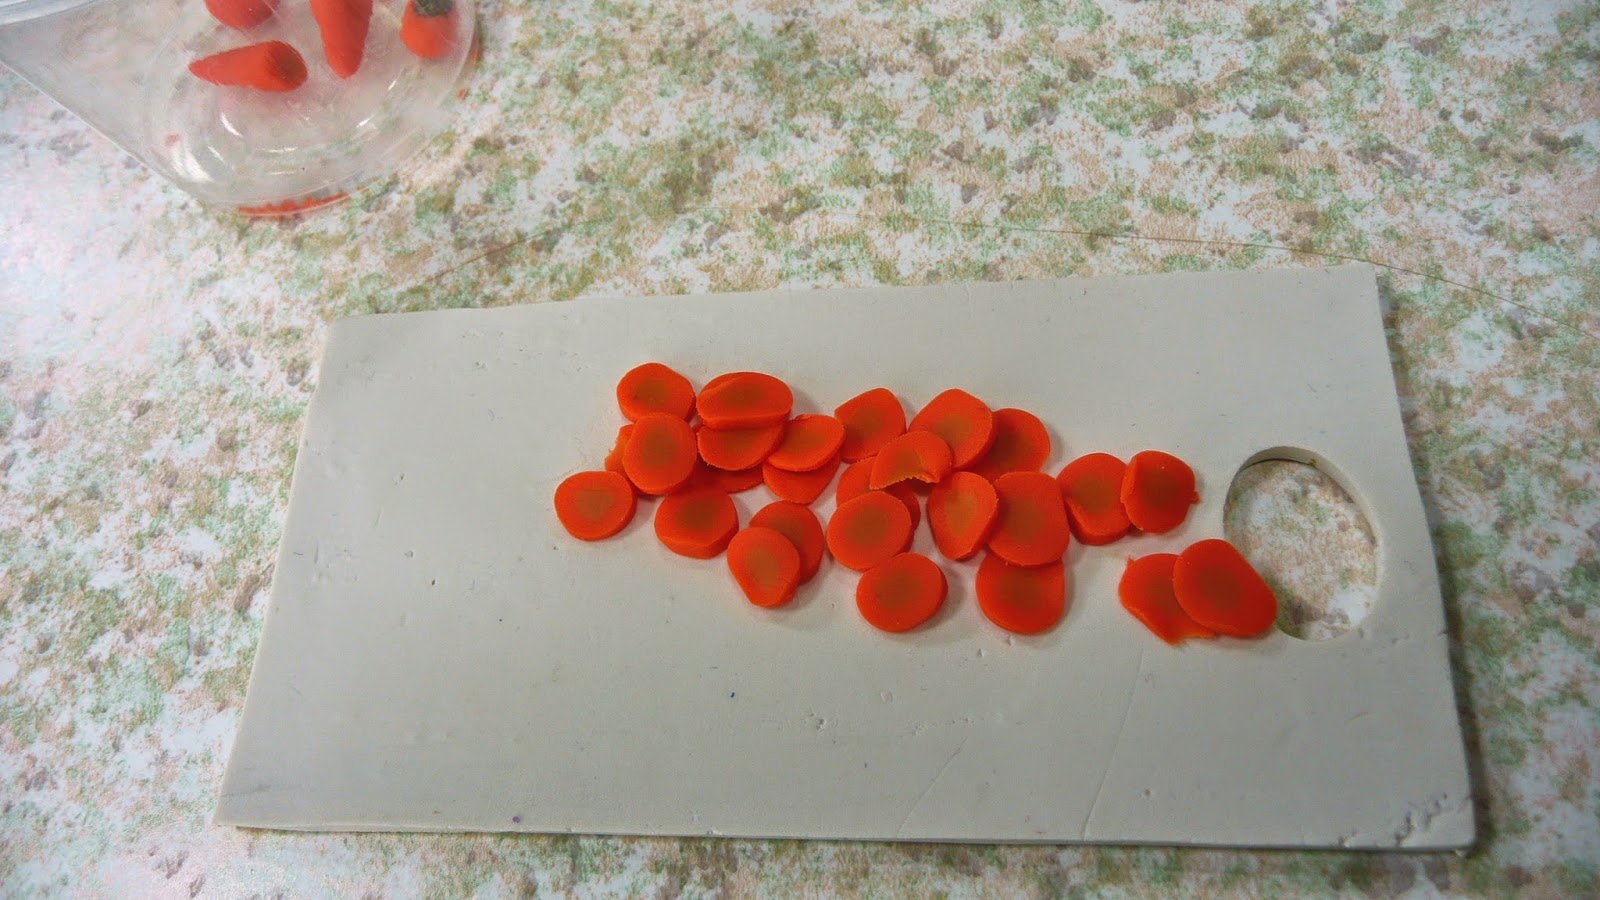 If
you are making carrot sticks cut off about 1” of the cane and cut
it into 4 sticks lengthwise. If you want to make “coins” wrap the
cane up really well and put it in the freezer for about 20 minutes.
This will make it easier to cut off the slices without flattening the
cane too much.
If
you are making carrot sticks cut off about 1” of the cane and cut
it into 4 sticks lengthwise. If you want to make “coins” wrap the
cane up really well and put it in the freezer for about 20 minutes.
This will make it easier to cut off the slices without flattening the
cane too much.
Again
bake at 350 for about 10 minutes.
 Since
I usually only use carrot sticks raw they are ready to go now.
However the carrot coins have a couple of options. You could leave
them as is and the dolls could enjoy them raw as a snack but I bet
the dolls would like a nice bowl of glazed carrots to go with dinner.
Since
I usually only use carrot sticks raw they are ready to go now.
However the carrot coins have a couple of options. You could leave
them as is and the dolls could enjoy them raw as a snack but I bet
the dolls would like a nice bowl of glazed carrots to go with dinner.
For
the glazed carrots we need a bowl, the one I am using came from one
of those sets the party stores carry. I think they think they are for
real people to use at appetizer parties. I think they are perfect for
the dolls to use for side dishes for dinner.
 Since
I really didn't want to sit here and make enough carrot slices to
fill the entire bowl I am first going to show you how to make a
filler for the bowl. I am using some Original Sculpey but you can use
whatever clay you want to. I always have some of the Original
Scupley on hand for stuff like this. You could also use scrap clay or
even some air dry clay. The problem with air dry clay is you would
have to wait for it to dry. If you are using a polymer clay be sure
to line the bowl with plastic wrap so you can get the block of clay
out without distorting the shape too much. This also protects the
plastic of the bowl from the affects of raw polymer clay.
Since
I really didn't want to sit here and make enough carrot slices to
fill the entire bowl I am first going to show you how to make a
filler for the bowl. I am using some Original Sculpey but you can use
whatever clay you want to. I always have some of the Original
Scupley on hand for stuff like this. You could also use scrap clay or
even some air dry clay. The problem with air dry clay is you would
have to wait for it to dry. If you are using a polymer clay be sure
to line the bowl with plastic wrap so you can get the block of clay
out without distorting the shape too much. This also protects the
plastic of the bowl from the affects of raw polymer clay.
Now
is the time to decide if you want a serving spoon in your finished
bowl of carrots. If so you need to make a spot for it now before we
bake the false bottom. I used the handle of a plastic spoon that
probably came with the set the bowls were in. I used a cutting tool
to remove the bowl of the spoon, I only need the handle for this
project. After cutting the handle free from the rest of the spoon use
it to make a hole where you want it to be when you finish. Remove
the handle and wipe all remnants of clay off of it.
Now
bake you false bottom for about 20 minutes and allow to cool.
Put
this baked clay lump back into the plastic lined bowl and paint the
top with some orange craft paint. I decided the first color I chose
was too bright so I added a yellow toned paint to help mute the color
a bit. It doesn't have to match the carrot slices but it does need to
blend with them.
After
the paint was dry I glued the base into my bowl and the handle into
the base. I like to Beacon 527 glue for polymer clay, over the years
I have always had good luck with it.
 Now
make sure how many slices of carrot you will need to cover the top of
your painted clay. After you make sure you have the amount you need
add some Gallery Glass paint in the colors- Crystal Clear and Amber
to the carrot slices. Stir this together really well so all the
slices are coated and then pour the mixture onto the top of the
painted clay base in the bowl. Spread the carrot slices around to
cover the top of the painted clay. Be sure work them around the spoon
handle so it looks like it is just stuck in the bowl.
Now
the hard part- the Gallery Glass paint needs to dry completely.
The
last thing I want to make this week are some baby carrots. I know we
eat a lot more baby carrots than regular ones. They are just so easy
and I am sure the dolls will want some to stock the fridge for
snacking.
 Since
baby carrots are a slightly different color than regular carrots I
mixed the two colors we used for the carrot canes to make the color I
wanted. Then it is as easy as rolling out a skinny snake (about 1/8”
in diameter) and cut it into ½” pieces. Then round off the ends
flatten slightly if you want to and bake.
Since
baby carrots are a slightly different color than regular carrots I
mixed the two colors we used for the carrot canes to make the color I
wanted. Then it is as easy as rolling out a skinny snake (about 1/8”
in diameter) and cut it into ½” pieces. Then round off the ends
flatten slightly if you want to and bake.
 |
| clay rolled in paper |
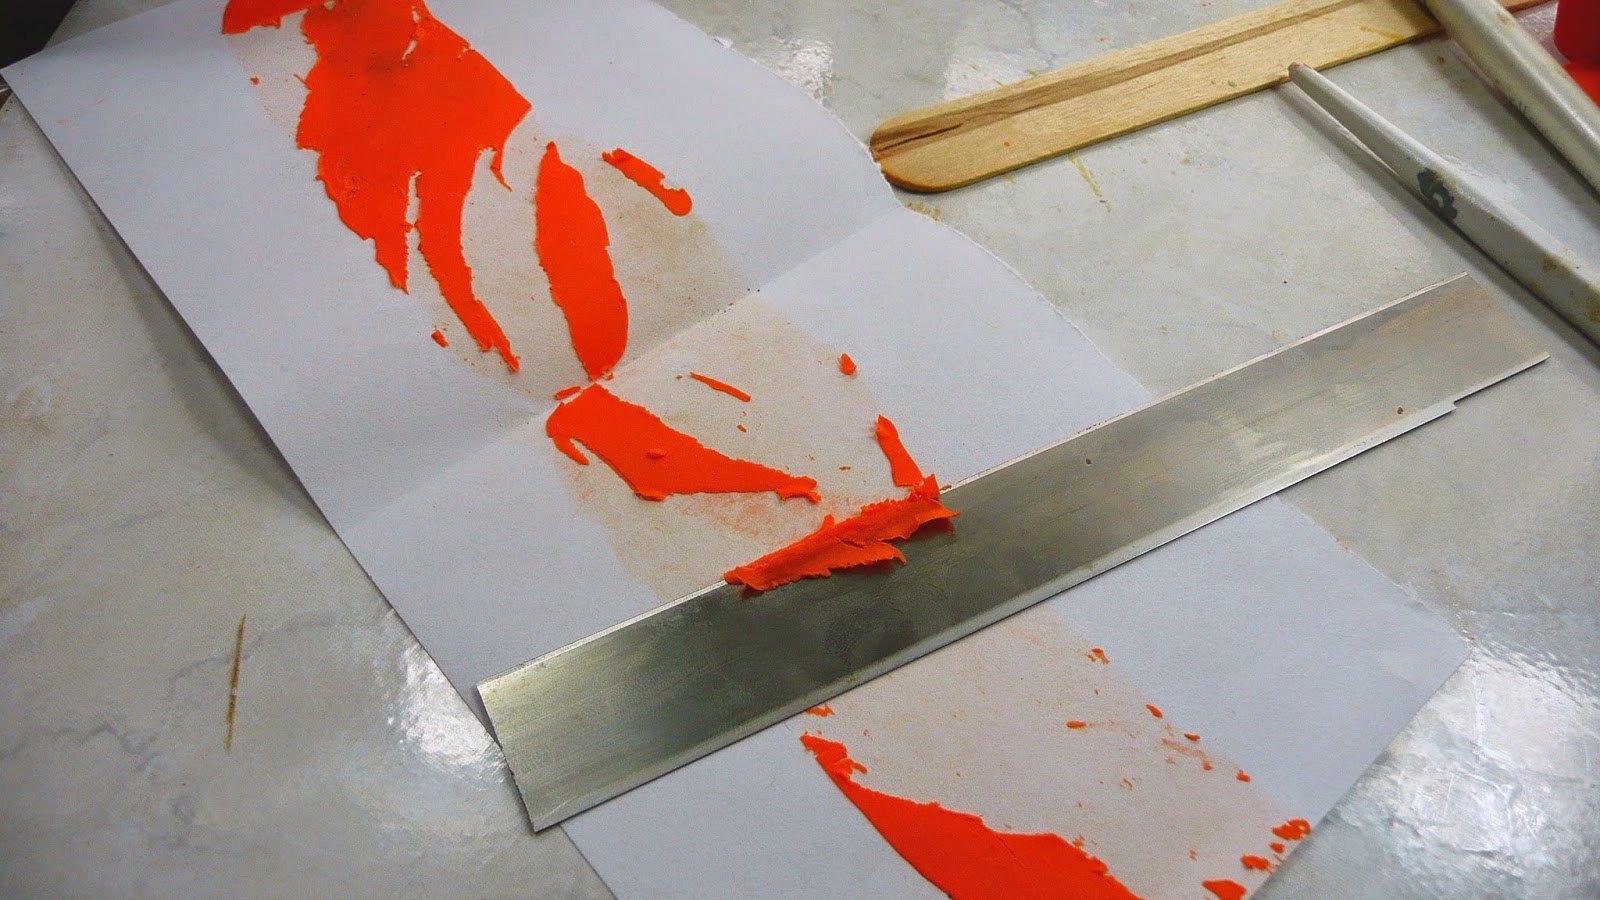 |
| scrapping clay off paper |
After
I had the video all done I realized it would be cool to have some
“carrot peels” to use in staging a photo I had planned. So I will
give you a look at how I did that too. First I took just a bit of my
orange clay and ran it through my pasta machine starting at #1 (the
thickest setting) and working all the way to #6 (the thinnest
setting) This made the clay really thin but not as thin as I wanted
so I grabbed a scrap of printer paper and placed the thin sheet of
clay on the paper and folded up the paper to entirely cover the clay
on both sides. Make sure you have enough space around the clay on the
paper that it doesn't come out the sides. I then ran it through that
same #6 setting once more. By adding the two layers of paper I made
the clay incredibly thin. I then brushed the same chalks I used on
the first batch of carrots on one side of the sheet of clay and used
my clay knife to scrap it off the paper and onto a paper plate for
baking. After baking I used my clay knife to chop up the thin sheets
into mostly strips.
 |
| on plate ready to bake |
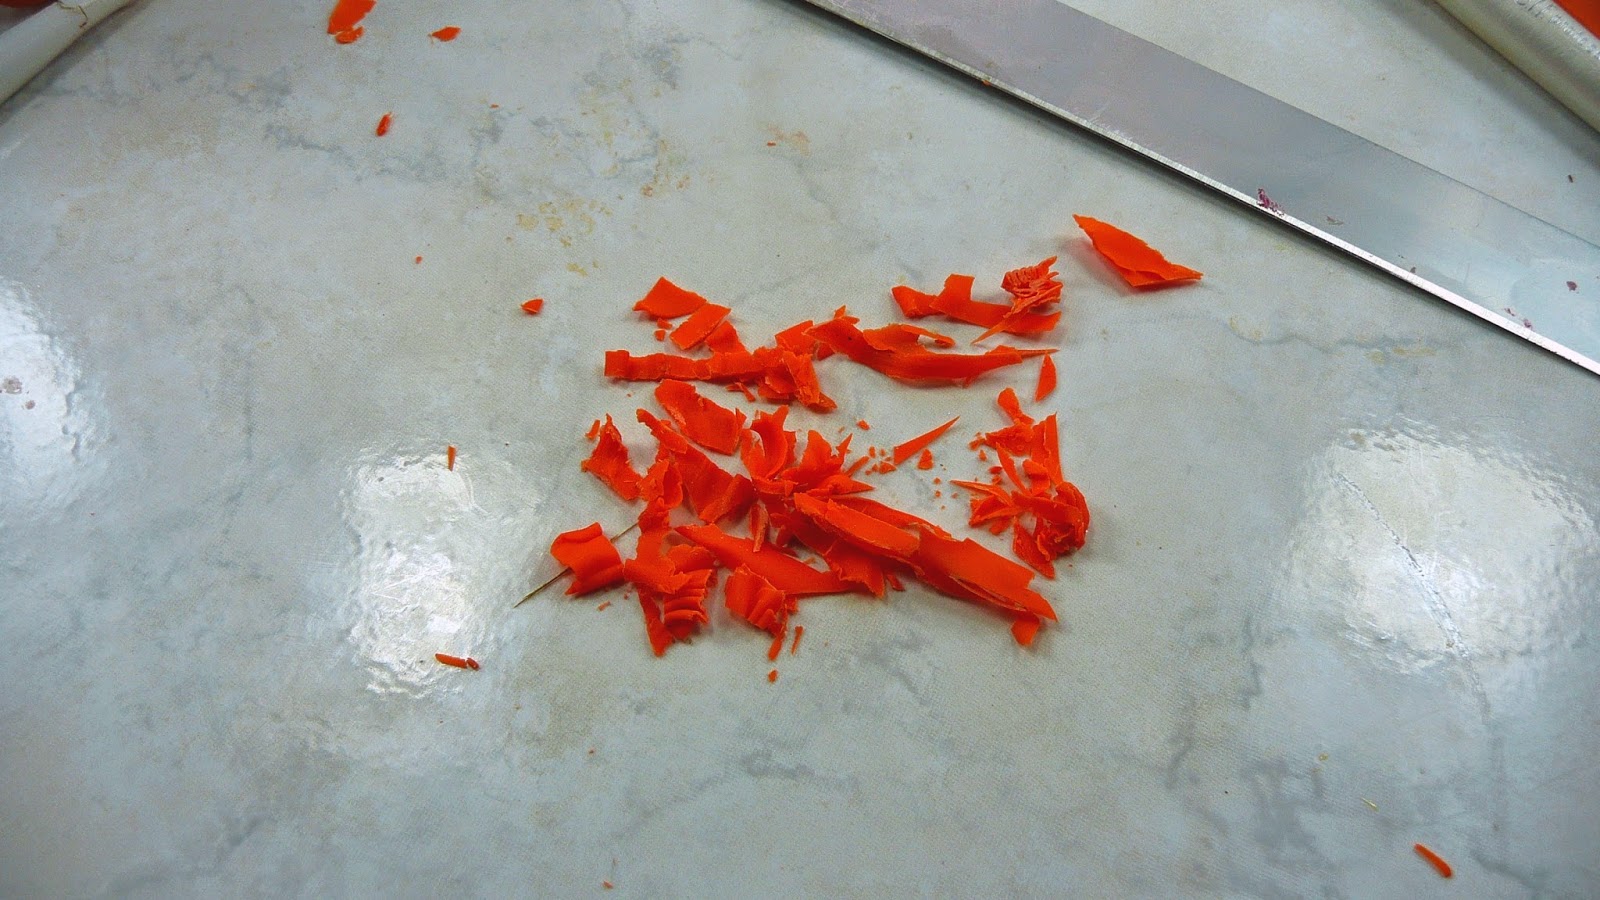 |
| baked , chopped and ready to use |
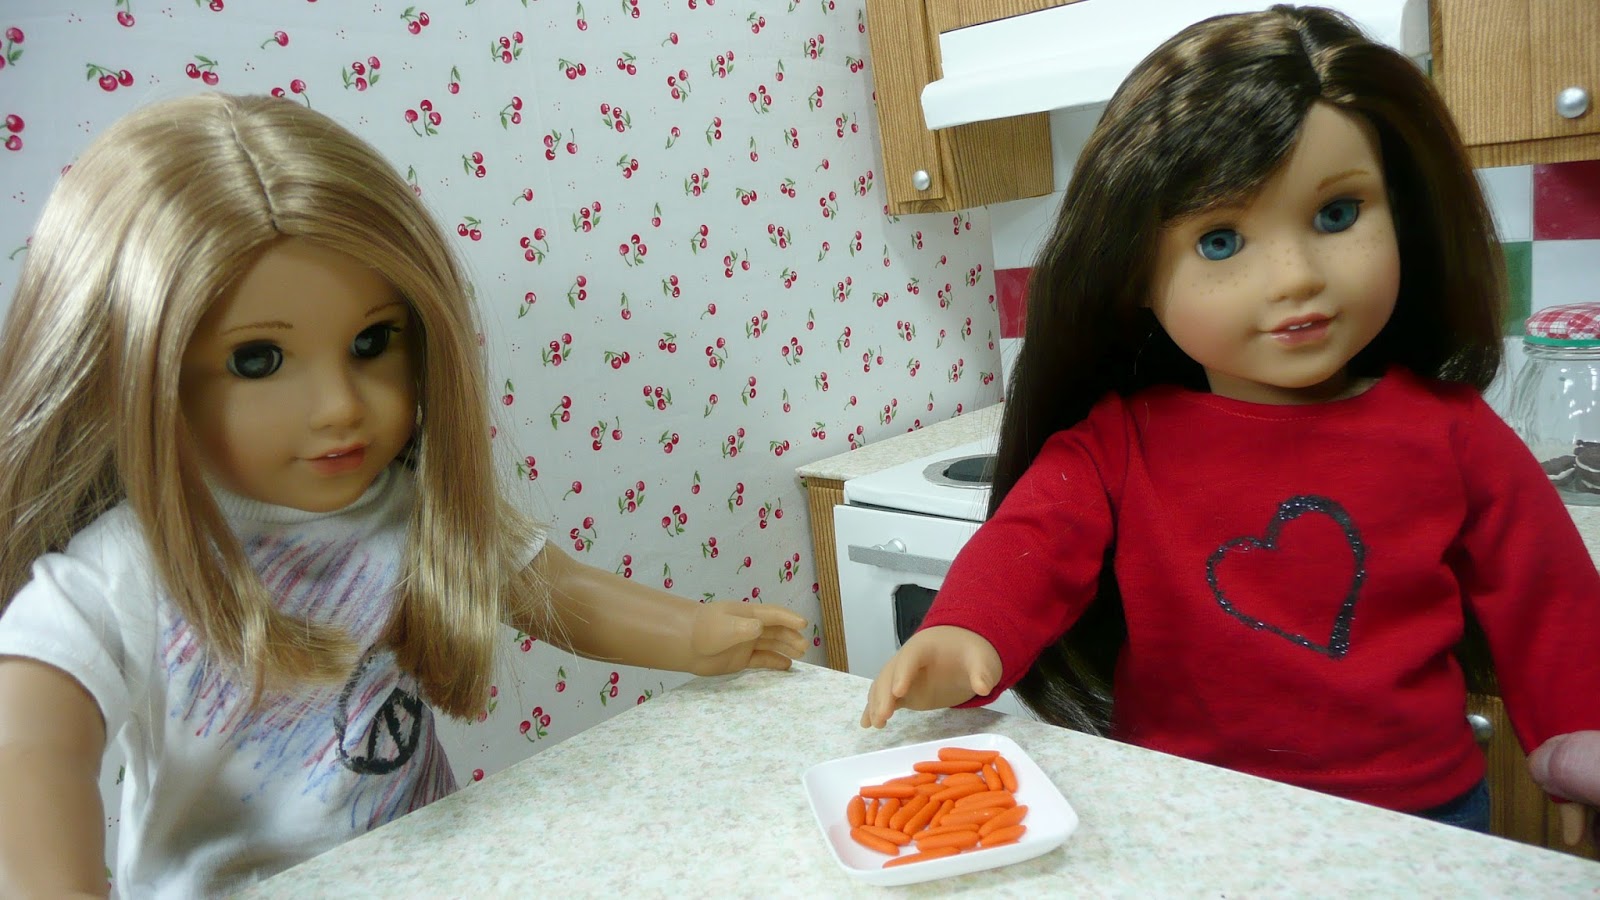
So
now the dolls have some healthy carrots to snack on and some glazed
carrots to serve at dinner time.
Wonderful tutorial! I didn't make full sized carrots since I had made them before. This was my first time making a cane. I think I did pretty well and the carrot slices and rounds turned out better than I expected. The absolute best were the mini or baby carrots. They were so fun to do and looked just like the real thing.
ReplyDelete