Friday, January 27, 2023

18” Doll Size Chocolate Candies


Watch the video here.


This week we are making some chocolate candies to fill the heart shaped boxes we made last week. If you missed that tutorial you can find it here.


For the candy today I am using some dark brown clay, Premo in Burnt Umber but you could use any dark brown, all the major clay brands have a nice rich dark brown in their lines. I mixed it with a bit of Translucent clay to make it both easier to work with and to give the finished project a better look. I find that without the translucent added they look a bit chalky. When it came time to make the milk chocolate I just added some white to give the lighter color.


Now let’s talk about the guide I made to help me roll the clay out. I have several other things like this but none were thick enough for this project. So I simply made two stacks of 3 craft sticks each, glued them with some tacky glue and clamped them until dry. This way I knew that they would be a consistent size.


I also printed off some graph paper in both 8 squares to the inch and 4 squares to the inch. I used a site that provides free PDF versions of many printable pages for free. Here is a link to the page I got mine from.


Now we need to roll out our clay using the guides we made earlier (or something else about ¼” thick) 


Then using the lines on the graph paper cut some squares (about 3/8” square) and rectangles (abut ¼” by ½”) for some of you candies.


For the round candies I looked around to find something that was about the correct size and that I thought most of you would have access to . I came upon the lid to my Sharpie marker and it was perfect.


Be sure to lay the piece of plastic wrap over the clay before using the lid to cut the candy shape. It does two things here. First it makes the top a nice round dome like a lot of nice chocolates have.. Secondly, and maybe most importantly it makes it easy to remove the clay from the lid after you cut it.


To create the heart shaped candies I started with the same round shape and then used one of my small dotting tools to make the dip in the top. I used my fingers to shape the pointed bottom end. If you don’t have a dotting tool you can use something like a toothpick.


Once you have made as many candies as you want bake them at the recommended temperature for your clay brand for 15 minutes and allow to cool to room temperature.


Now we just need to add a light coat of a clear satin finish to our candies and allow to dry.


Now you have some nice expensive looking chocolates for the dolls to share with their favorite valentine.


As always I do want to sincerely thank all of you for watching my videos and reading my blog posts. It means so much to me that you are supporting me in this way. If I could ask you all to do just a bit more by subscribing to the channel and liking the videos and leaving comments. Those help more than you can imagine. Also if you could pass the links on to your friends I would appreciate it so much.


Friday, January 20, 2023

18” Doll Size Valentine Candy Box


Watch the video here.


This week I wanted to show you how to make this fun heart shaped candy box for the dolls. After all Valentine’s Day will be here in a few weeks and the dolls need to be ready.


Over on my dollhouse miniatures channel I have been making a lot of projects with free patterns that can be downloaded to make them much easier for my viewers to recreate. I decided to do some over here on the doll channel too. So this week I have free pattern for this candy box that you can find right here. The link will lead you to Google Drive where you will find a folder that contains the pattern in two forms. A PNG to be used with any electronic cutting machine that uses PNG files. (be sure to consult the text file for directions on sizing) In addition there is a PDF that can be printed and used if you are hand cutting the pieces.


I am happy to have you use the pattern to make candy boxes for yourself, your friends or even to sell. Just please don’t sell or share the pattern. If someone else wants to make one too send them to my video/blog post so they can download it themselves.


I am using just plain medium card stock in white for this project. I find that many colors of card stock fade badly and the painted stays true to color a bit better. Also, the paint helps to disguise the fact we made this from layers of card stock instead of a single layer of heavier material.


I am going to lead you through the process of what I did in the video here.


Let’s start with the box bottom:


 Once you have the pieces cut they should look like this:


I have 4 large hearts, 6 smaller hearts and 1 strips.


Set the strips off to the side for a bit and glue the hearts together in two stacks, one of the larger hearts and one of the smaller ones. Do your best to keep the edges lined up and even and use a small amount of thick glue. I do suggest drying the pieces under a bit of weight to help keep them flat.


Once dry we are going to add the wider of the two strips to the sides of the smaller heart. First use something like a blade of your scissors to slightly curl the strip then give it a fold in the center. Now line the fold up with the “v” at the top of the heart and glue it around. The strips are all cut a bit long so that you can trim them. Fold the end of the first side around the bottom of the heart. (I forgot to take a picture of this but I did take one of the pieces for the lid so check below if you can’t visualize what I am saying here) We will trim the second side when the glue dries. Be sure the strip is lined up with the back of the heart all the way around. Allow the glue to dry.


Once the glue is dry cut off the extra bit of the strip of paper at the bottom of the heart. Now repeat the process with the narrower strip being very careful to keep the long edges lined up at the back side of the heart. Allow to dry.

Once dry trim the strip just like we did before. Now it is time to glue this heart to the larger heart. Apply thick glue to the back of the small heart and do your very best to line it up in the center of the larger heart. You might need to weight down the smaller heart to keep it flat against the larger heart. Allow to dry.


Now we can proceed with the lid to the box. Here are the pieces cut out. The are the same as for the box bottom except the strips are narrower.


Glue the hearts together exactly as we did with the box bottom.


Now for the strips. Here is what they should look like when they are curled.


And here is what I mean by making the crease in the center.


Now for the big difference in the box lid from the box bottom. We need to glue the narrow strip on first this time. This will allow the top of the box to fit onto the box. Allow to dry.


Now add the wider strip to the lid. Allow to dry.


Again we need to glue the smaller heart with the sides glued onto it to the larger heart. Again being very careful to line it up in the center as best as you can. Allow to dry.


Once the glue has dried paint both pieces with some red (or your choice of color) craft paint. You will probably need two coats you want a nice even color. Allow to dry.


I used some wash tape to decorate the top of my box, you could to the same or use a pretty sticker, or you could paint a design, of add some Valentine paper, or leave it plain. I do suggest that if you use a sticker or wash tape you add it with a layer of glue instead of depending on the sticky to remain good. Some times over time the sticky baking can fail so glue will help the project still look nice in years to come. Allow any glue/paint used to decorate the box top to dry completely.


Now we need to add a thin even coat of Satin Mod Podge to both pieces avoiding the places that will touch when the lid is on the box. Allow to dry.


Now we have a wonderful candy box but no candy……


come back to the tutorial next week where will be making some chocolates to add to the box.


As always I do want to sincerely thank all of you for watching my videos and reading my blog posts. It means so much to me that you are supporting me in this way. If I could ask you all to do just a bit more by subscribing to the channel and liking the videos and leaving comments. Those help more than you can imagine. Also if you could pass the links on to your friends I would appreciate it so much.


Friday, January 13, 2023

Doll Size Hot Cocoa


Watch the video here.


I have been wanting to do this tutorial for a while and since the weather at least this week while I am filming is pretty cold here I thought the time is perfect. Although if your dolls are anything like my grandson it is always hot cocoa time.


I am beginning with a mug I made pretty much the same way I made them in this tutorial from a few years ago. The only real change I made was to use gloss Mod Podge instead of the Triple Thick. I have pretty much quit using the triple thick for the most part and I don’t have any right now. I have used Mod Podge on things that I have baked with polymer clay for a couple of years and so far have had no problems. If you are concerned about the fumes that might be there you could wait and finish the outside of the cup after you finish. But like is said I have not had problems so far.


Since the mug is about 1 ¼” tall that would be a lot of clay if we used clay to fill the mug. Instead I chose to use a piece of the same dowel (actually a wood handle from a plunger from the dollar store) that I formed the mug over when I made it. I simply cut a piece of the dowel 1” long and used a bit of Tacky glue to adhere it inside the mug. This way my area to fill is much less.


Now I didn’t want to add the hot cocoa directly to the top of the wood. The wood will be very porous and might soak up a some of our liquid clay mixture. So I used a bit of liquid clay to attach a thin layer of a medium brown color polymer clay and baked it for 10 minutes at the temperature recommended for your brand of clay. I tried to be careful to make the top somewhat even but more importantly I worked it to the edge of the mug to form a seal so I wouldn’t loose my liquid clay down the sides. This will need to cool to room temperature before you do the next step.


We can also make your marshmallows now so they can bake along with the mug. For that we just need some white polymer clay. Roll our a snake about 1/8” in diameter and cut little slices about 1/8” long. Once cut squish gently between your index finger and thumb just enough to round off the edges and make them slightly bulge. 


Drop them into a small container. Once you have as many marshmallows as you want dust in some cornstarch and coat them thoroughly. Then put them onto your baking container and bake for 10 minutes.


Now we need to mix the liquid polymer clay, I am using Liquid Sculpey in white, with some brown oil paint. It is important to use oil paint and not any water based paint for this step. The ones I use came in a really cheap set from the craft store many years ago. I use them all the time but they will last for a very long time. The color I used was Burnt Umber. You just want a tiny bit of the paint mixed into the liquid clay. Keep in the mind the color of the baked clay could be darker than what it looks in the liquid state. I highly recommend putting a small drop onto a piece of foil and baking it for 10 minutes and allow it to cool. Then check color and also you can make sure it cured properly. Too much paint and the liquid clay won’t cure it will remain sticky and soft.


Once you have the correct color add the liquid clay to the top of the brown clay in your mug. I love using a small dotting tool for this job. Work the layer of liquid clay all over the top all the way to the edge. Once you have a nice coat of it in the mug we can add some bubbles if you want to.


For the bubbles I am using some really tiny clear no-hole beads, they are sometimes called micro-beads. The clear ones make wonderful bubbles when added to the liquid clay mixture. Just don’t over do it. I added just a few and tried to keep most of them around the sides of the mug.


Now drop in as many marshmallows as your dolls would like to have.


Bake the entire thing for another 10 minutes at the recommended temperature for your clay and allow to cool.


Now the dolls can enjoy a nice mug of hot cocoa.


As always I do want to sincerely thank all of you for watching my videos and reading my blog posts. It means so much to me that you are supporting me in this way. If I could ask you all to do just a bit more by subscribing to the channel and liking the videos and leaving comments. Those help more than you can imagine. Also if you could pass the links on to your friends I would appreciate it so much.

Friday, January 6, 2023

Doll Size Sour Gummy Worms


Watch the video here.


I know it has been forever since I posted but I am hopeful that this year I can keep up with everything and give you guys a tutorial almost every week. I am aiming for a minimum of 3 per month but I am hoping to have something for you every week. I am planning to do a mix of polymer clay foods, paper projects and some sewing mixed in too. If you have requests be sure to let me know.


That means I need you all to do me a favor, comment on the videos over on YouTube and hit that thumbs up button. Also if you could pass the link to the video along to your friends that make doll things that would be really helpful too.


This week I have a fun candy tutorial for you, some of those sour gummy worms. They are so easy to make even for someone that hasn’t done a lot of clay projects.


The real candies have a translucent quality to them so we are going to be using mostly translucent clay. The brand doesn’t matter some brands are more translucent than others but this project is pretty forgiving.


As for the colors here is what I used to come as close to the brand of candies I had bought.


Fimo- Mandarin

Fimo- Peppermint

Fimo- Plum

Sculpey III- Red Hot Red

Sculpey III- Yellow

Sculpey III- Granny Smith Green


I used 4 parts Translucent clay with 1 part of the colored clay for each color. I then baked a small sample of the colors and adjusted my mix. I did have to add a bit more translucent to the plum since it is a denser color.


Once I was happy with the color I rolled the clays into skinny snakes and cut them into pieces about 3/8” long. I then paired the colors so that each set had two colors that looked like they belonged together. I did consult the candy package that I had to get combinations somewhat.


I then smooshed the ends of the pieces together in each pair and make a snake about ¾” to 1” long.


I rolled these using my clay roller slightly to make them the thickness of a set of double layer craft-sticks. And then cut them to about the same width as they were thick. These candies in real life are a somewhat square shape not a round snack shape.


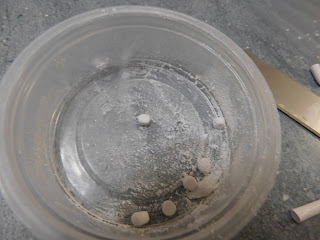
Then I rolled the raw clay candies in some white sand to coat them.


I moved them to my baking surface (a plain paper plate) making sure to give them each a bit of a curve. These candies are never straight when you get them.


Next I baked them at the temperature recommended for my clay for 10 minutes and allowed them to cool to room temperature.


There you have some really easy but fun candies for your favorite 18” dolls.


And here you can see the doll size along side a real candy.


As always I do want to sincerely thank all of you for watching my videos and reading my blog posts. It means so much to me that you are supporting me in this way. If I could ask you all to do just a bit more by subscribing to the channel and liking the videos and leaving comments. Those help more than you can imagine. Also if you could pass the links on to your friends I would appreciate it so much.